The Horseshoe Bend hike is short, flat and easy by general standards — but the 0.7-mile walk is fully unshaded on packed sand, which makes summer afternoons physically harder than the distance suggests. Most of the search results for “Horseshoe Bend hike” either oversell the difficulty (treating it like a backcountry trail) or undersell the exposure (treating it like a city park path). It is neither. After walking it three times in 36 hours during the July 2025 field trip — including the noon shift specifically to test the heat — this is the trail breakdown with no padding.
Distance
0.7 mi each way (1.4 mi RT)
Time
15–20 min each way
Surface
Packed gravel + compacted sand
Shade
None — fully exposed
Elevation gain
Negligible (~10 m)
Difficulty
Easy by distance · hard by exposure
Quick answer: what is the Horseshoe Bend hike like?
The Horseshoe Bend hike is a 0.7-mile (~1.1 km) one-way walk on a flat, packed-sand-and-gravel trail with no shade, taking 15–20 minutes each way at a relaxed pace. It splits roughly halfway into two branches: the left branch is the wheelchair- accessible packed path added by the City of Page in 2020, ending at a fenced viewing platform; the right branch is the original sandy trail that leads to the unfenced main overlook. The hike itself is genuinely easy — the only difficulty for most visitors is the heat exposure in summer afternoons, which is real but manageable with water and a hat.
Trail breakdown: parking lot to the rim
From the moment you leave your car to the moment you reach the rim, the trail goes through four distinct segments:
- Segment 1 — Parking lot to trailhead (~50 m, 1 minute). Cross the lot, pass the shade ramada and the restrooms, walk past the information board with current conditions and sunset time. Restocks of water from the fountain (when operational) happen here, not at the rim.
- Segment 2 — Initial climb on packed surface (~150 m, 3–4 minutes).A very gentle hill leaves the trailhead. This is the only stretch with any meaningful gradient and even then it is barely a 5% slope. Packed gravel and compacted sand surface; stable for any standard shoe.
- Segment 3 — Flat sandstone bench (~300–350 m, 4–5 minutes). The trail levels out onto the sandstone bench that sits between US-89 and the canyon rim. This is the most exposed segment. No shade structure, no benches, no water. Wide enough for groups to pass each other comfortably.
- Segment 4 — The split (~halfway in, roughly 550 m from trailhead).A signed Y-junction. Left branch heads to the ADA-accessible raised platform with a guardrail (the only fenced viewing spot). Right branch heads to the unfenced main overlook on a sandier, slightly narrower path. Both branches add roughly another 200–250 m before reaching the rim.
On the way out, the trail reverses with one small advantage: the gentle initial hill is now a gentle descent. Most visitors notice the return feels easier than the outbound walk by about 25%.
The ADA accessibility path (added 2020)
The City of Page completed the accessibility upgrade in 2020 — a wider, more stable, gentler-graded packed path on the left branch ending at a raised wooden-and-steel platform with a guardrail. This is the only sanctioned wheelchair access to the rim and is also the only place on the rim with a fence.
Practical notes from observation during the July 2025 visits:
- Standard wheelchairs can manage the left branch with one assistant pushing, especially on the return uphill leg. The packed surface is good but the initial trailhead slope is the section where assistance helps.
- Power chairs handle it unassisted. The width is generous (1.5 m+) and the surface holds firm even after wind events.
- Strollers roll smoothly along the entire left branch including the platform. The right branch is not stroller-friendly — too sandy in places.
- Walkers and canes: the left branch surface is stable and predictable, with no loose-rock segments. The right branch has loose sand patches that can shift footing.
- The right branch (unfenced main overlook) is not accessible. It is reachable only on foot, on loose sand, with no guardrail at the end. A wheelchair cannot get to that viewpoint.
- Surface conditions can degrade after winter storms or strong winds. If you are travelling with someone using a mobility device, call City of Page Parks & Recreation the morning of your visit for current conditions (the path has occasionally been closed for resurfacing).
For the full parking lot context including the ADA-marked spaces at the trailhead, see the dedicated Horseshoe Bend parking guide.
What to bring (and what to skip)
What you actually need on the hike depends on the season and the time of day. The headline rule: bring more water than you think, especially from May through September.
| Item | Summer (Jun–Sep) | Shoulder (Mar–May, Oct–Nov) | Winter (Dec–Feb) |
|---|---|---|---|
| Water | 1.5 L+ per person | 1 L per person | 0.5 L per person |
| Wide-brim hat | Essential | Recommended | Optional |
| Sunglasses | Essential | Essential | Recommended |
| Sunscreen | Essential — reapply at rim | Recommended | Snow days only |
| Closed-toe shoes | Essential — sand burns through sandals | Comfortable shoes fine | Closed-toe + warm sock |
| Layers / jacket | Light evening layer if staying for sunset | Mid-layer for windy days | Warm jacket + hat |
| Microfibre cloth (camera/phone) | Recommended | Recommended | Recommended |
| Offline map / pinned GPS | Recommended | Recommended | Recommended |
What to skip:
- Tripods, monopods, selfie sticks— banned on the rim by City of Page Parks & Recreation. Phones and handheld cameras only.
- Drones — banned by FAA regulation (Glen Canyon NRA airspace) and proximity to Navajo Nation land. Rangers enforce.
- Hiking poles — overkill for 0.7 miles of flat trail unless you normally use them for balance. Otherwise they are something extra to carry on an already short hike.
- Heavy backpacks — the trail is short and the parking lot is a 5-minute walk away. Leave non-essentials in the car.
Hiking with kids or older relatives
Horseshoe Bend is one of the more family-friendly viewpoints in the Southwest in terms of effort — the distance and grade work for almost anyone — but the rim itself is the genuine hazard. During the July 2025 visits I counted children of every age from toddlers in carriers to teenagers, plus several visitors in their seventies on the left branch. The pattern was consistent: families that planned ahead used the left branch and stayed relaxed; families that headed straight to the unfenced right-branch overlook were visibly tense the whole time. Specific guidance by group:
- Kids under 6: use the left branch (fenced platform). The right-branch overlook is a 1,000-foot vertical drop with no barrier. Tour guides will tell you about the visitor fatalities every year from people who underestimated the edge — typically people backing up for a photo.
- Kids 6–12: either branch works if a parent holds their hand within 3 m of the rim on the right branch. Have the no-running rule established before you arrive — the open sandstone is tempting for running but the edge is not signposted.
- Teens: the right branch is fine with a clear briefing. Show them the edge from a safe distance first so the scale registers.
- Older relatives: the left branch is the natural pick — the guardrail removes the anxiety and the surface is the easiest. The right branch is doable but the sandier sections and unfenced edge are stress points many older visitors do not enjoy.
- Strollers: left branch only. The path is wide and packed enough for a standard stroller. Front-pack carriers work on either branch.
Heat, monsoon, winter — weather scenarios
Three weather conditions change the hike materially. Knowing how to handle each is the difference between a memorable visit and a regrettable one.
Summer heat (June–September)
The trail is fully unshaded on light-coloured sand that reflects sun back at you. On a July afternoon the air temperature at the rim is typically 35–40°C and the sand surface temperature exceeds 50°C. Closed-toe shoes are not optional — sandals will burn through. Bring 1.5 L of water minimum per adult, more for children, and drink some before you start, not just at the rim. If you can choose, do this hike at sunrise (cool but the river is in shadow), late afternoon (4:30–6:00 pm — the afternoon-light window — see the dedicated timing guide) or skip midday entirely.
Monsoon thunderstorms (July–mid-September)
The rim is completely exposed to lightning. National Weather Service issues afternoon thunderstorm watches almost daily through monsoon season. If the sky to the south or west shows visible cumulus build-up by 3 pm, do not start the hike. If you are already on the trail and a storm builds quickly, turn around — there is no shelter on the trail or the rim, and the parking lot ramada is the closest thing to cover within ~15 minutes. Operator-style cancellations do not apply here (Horseshoe Bend is self-guided), so the safety call is yours.
Winter cold (November–February)
The rim is consistently 5–8°C colder than the parking lot due to wind exposure with no break. Bring a layer beyond what you feel you need at the gate. The trail stays open and accessible through winter — the surface is the same packed sand year-round — but the windchill can be brutal. After winter storms (uncommon, ~4–6 days per year in Page), the trail may close briefly for safety inspection. Call ahead if you are visiting in January or February after recent snow.
Wind
Mentioned separately because it is constant year-round at the rim. The flat sandstone bench between US-89 and the canyon funnels wind upward. Hats need a chin strap or a tight fit; loose papers and maps get blown over the edge. Photographers using ultralight cameras should weight bags before setting anything down.
Trail vs viewpoint: what you actually do
For honesty about what the visit feels like once you are there:
- The 0.7-mile walk in is uneventful. Flat, open desert terrain with US-89 traffic noise audible for the first third. Most visitors walk in steady silence.
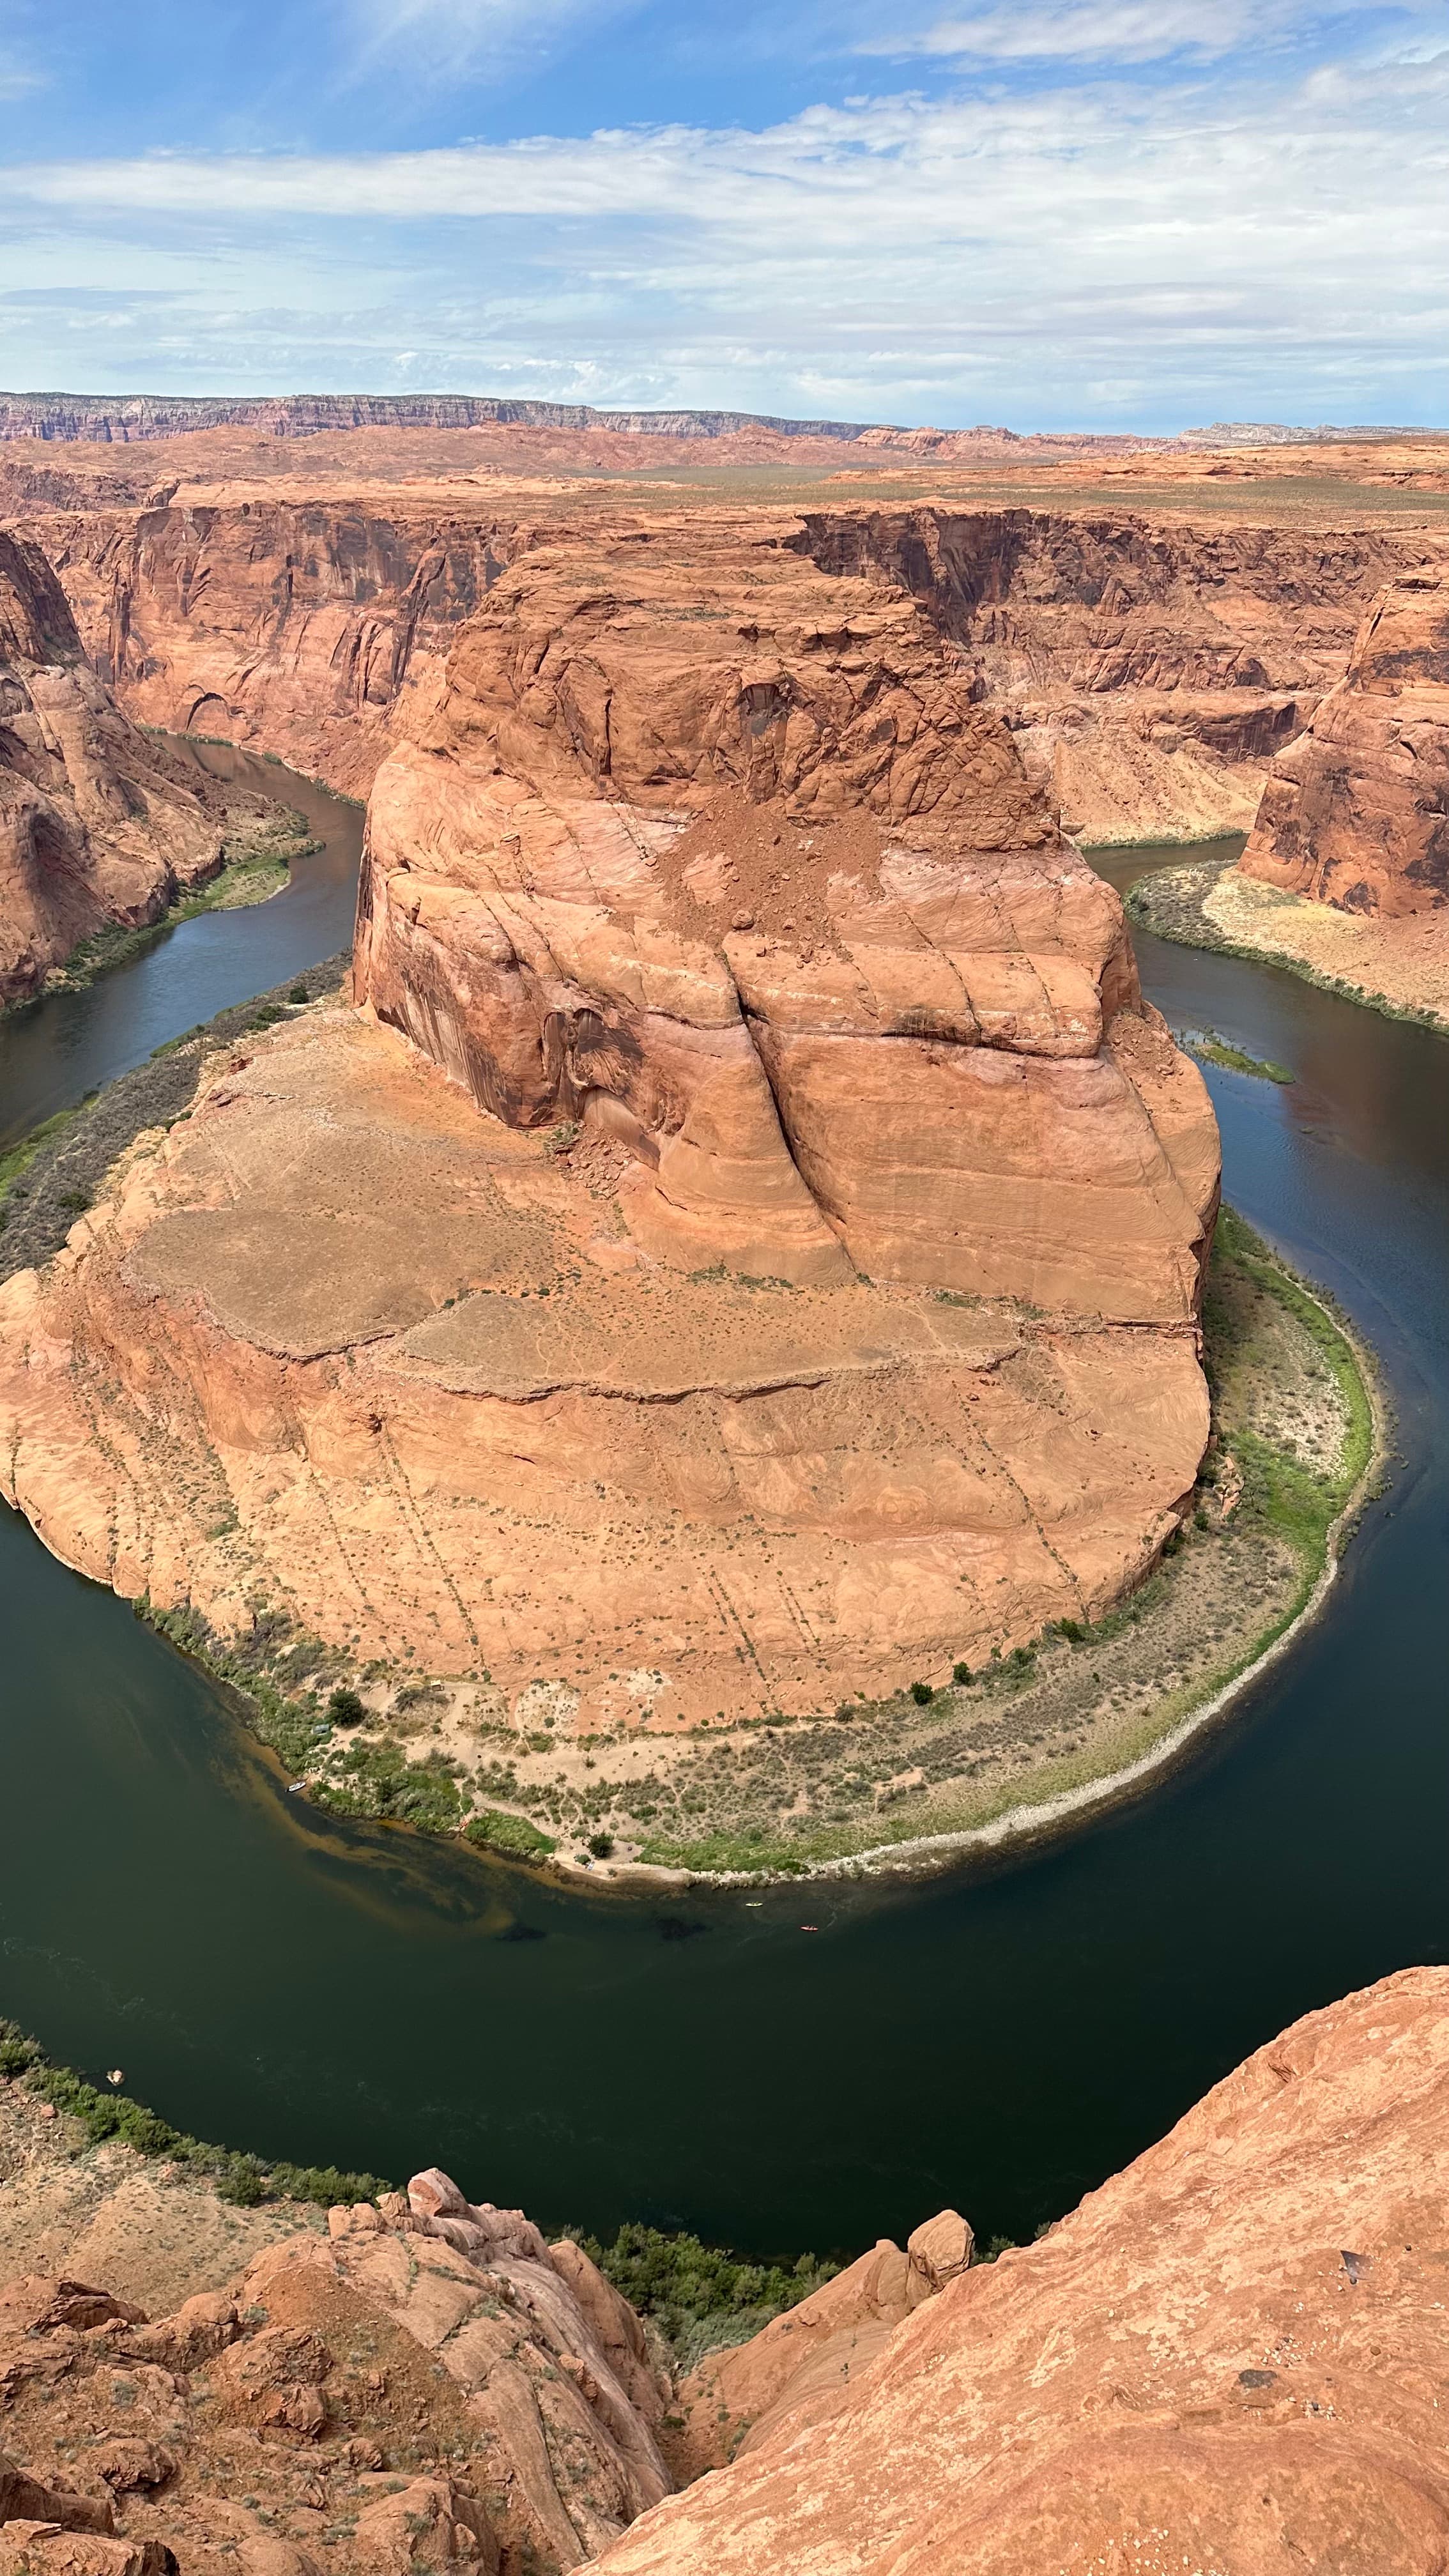
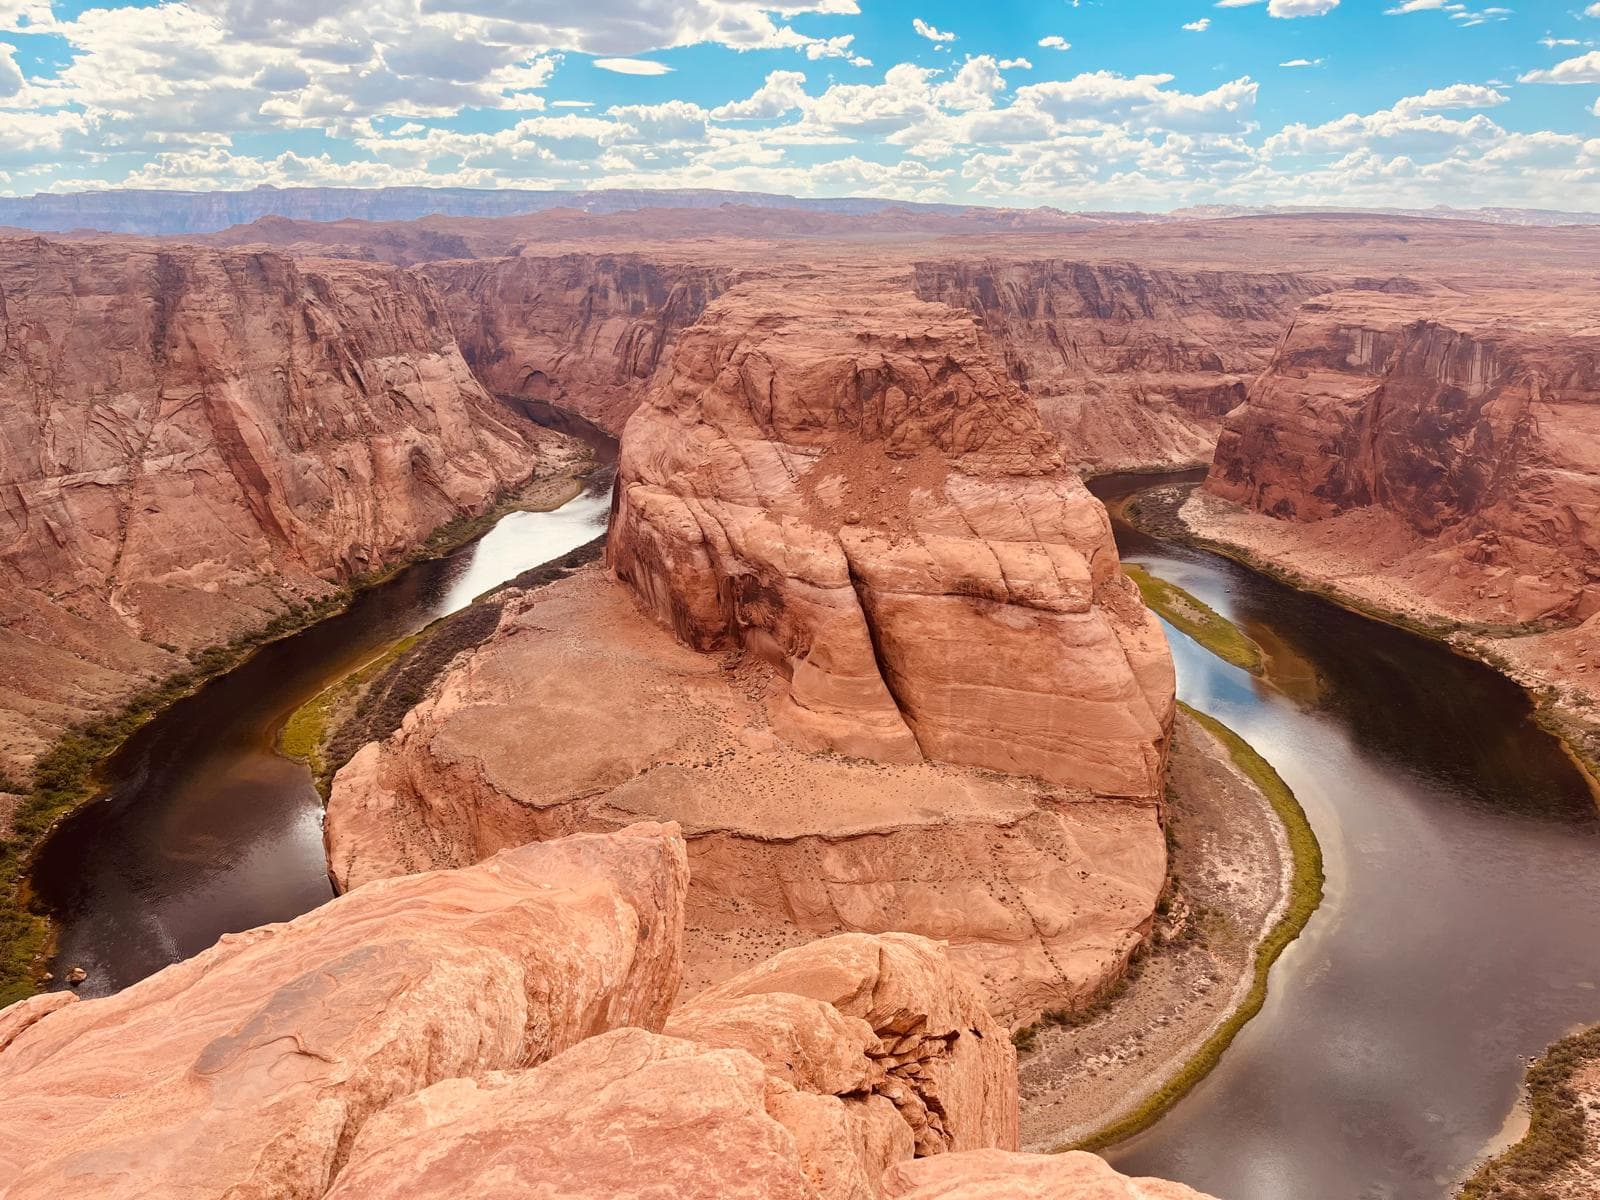
- The arrival at the rim is the moment. The bend opens up suddenly — there is no gradual reveal. You walk over the lip of the sandstone and the entire 270-degree meander is below you at once. First-time visitors consistently react with audible surprise. This is the payoff for the hike.
- Time at the rim averages 20–40 minutes depending on whether you are there for the afternoon-light window (longer) or just a quick stop (shorter). Photographers stay closer to 60 minutes during the light window.
- The walk back is faster than the walk in (gentle downhill, the wow of the rim still fresh, your legs have warmed up). Most parties cover the return in 12–15 minutes.
Total realistic on-site time is 60–90 minutes for a normal visit. Add 15 minutes for the queue at the parking gate on summer afternoons (1:30–5:00 pm peak), which pushes the worst-case to 75–105 minutes.
Frequently asked questions
How long is the Horseshoe Bend hike?
The Horseshoe Bend hike is 1.4 miles (2.3 km) round trip — 0.7 miles each way. Typical one-way time is 15–20 minutes at a relaxed pace; the return is faster because the gentle hill reverses in your favour. The trail surface is packed gravel and compacted sand on a flat sandstone bench above the canyon rim, with no elevation gain or loss worth measuring. It splits roughly halfway between a fenced viewing platform on the left branch and the unfenced main overlook on the right branch.
Is the Horseshoe Bend hike difficult?
No, by general hiking standards it is easy. Flat surface, no climbing, no scrambling. The difficulty for most visitors is not the terrain but the exposure: the entire 0.7-mile walk is unshaded, on packed sand that reflects heat back at you in summer. From June through mid-September the trail is hard work in the 11 am – 3 pm window because of heat, not because of difficulty. Late afternoon and early morning are physically much easier.
Is Horseshoe Bend wheelchair accessible?
Partially, via the left branch of the trail (added in 2020). The left branch is a wider, packed-surface path with a gentler gradient that ends at a raised platform with a guardrail — the only fenced viewing spot on the rim. Standard wheelchairs need one assistant pushing on the return uphill leg. Power chairs handle it unassisted. The right branch (the original sandy path leading to the unfenced main overlook) is NOT accessible — that overlook can only be reached on foot.
Can children do the Horseshoe Bend hike?
Yes, easily — the hike itself is short and flat. The real concern is the rim itself: the unfenced main overlook is a 1,000-foot vertical drop with no guardrail. Children of any age should be kept on the fenced platform (left branch) or held close by an adult on the right branch. Strollers roll fine on the left branch's packed surface; the right branch is loose sand in places and not stroller-friendly.
What should I bring to the Horseshoe Bend hike?
For a summer afternoon visit: at least 1 litre of water per person, a wide-brim hat, sunglasses, sunscreen reapplied at the rim, and shoes with closed toes (the sand surface can exceed 50°C on a July afternoon and burns through sandals). For a winter visit: layers — the rim is consistently 5–8°C colder than the parking lot due to wind exposure. For any visit: a microfibre cloth (lens dust), a phone with offline maps preloaded (cell signal drops on the trail), and small bills for the $10 parking fee at the entrance gate.
How long should I plan for the whole visit?
60–90 minutes is the realistic on-site time. That covers the 15–20 minutes each way of walking, 20–40 minutes at the rim for photographs and observation, and a small buffer for the queue at the parking gate during summer afternoons. If you are coming specifically for the afternoon-light window, add the time needed to arrive 30–45 minutes before the window starts so you can compose your shot — total visit closer to 90–120 minutes.
About this guide
Written by Diego Fresno, travel writer and independent publisher specialising in the American Southwest. This hike breakdown is based on three walks of the Horseshoe Bend trail in July 2025 — including the noon shift specifically to test summer heat exposure on the sand — plus current City of Page Parks & Recreation trail and accessibility notes cross-checked in May 2026. Verified quarterly — last review April 2026. About the author →
Related guides
Horseshoe Bend: the complete 2026 guide
The full pillar — geology, accessibility 2020 update, how to combine with Antelope Canyon and the wider context.
Horseshoe Bend parking guide
$10 fee, ~300 spaces, RV rates, ADA spaces near the trailhead and when to arrive to skip the queue.
Best time to visit Horseshoe Bend
Why sunrise does not work, the afternoon-light window month by month, and photography settings for the rim.
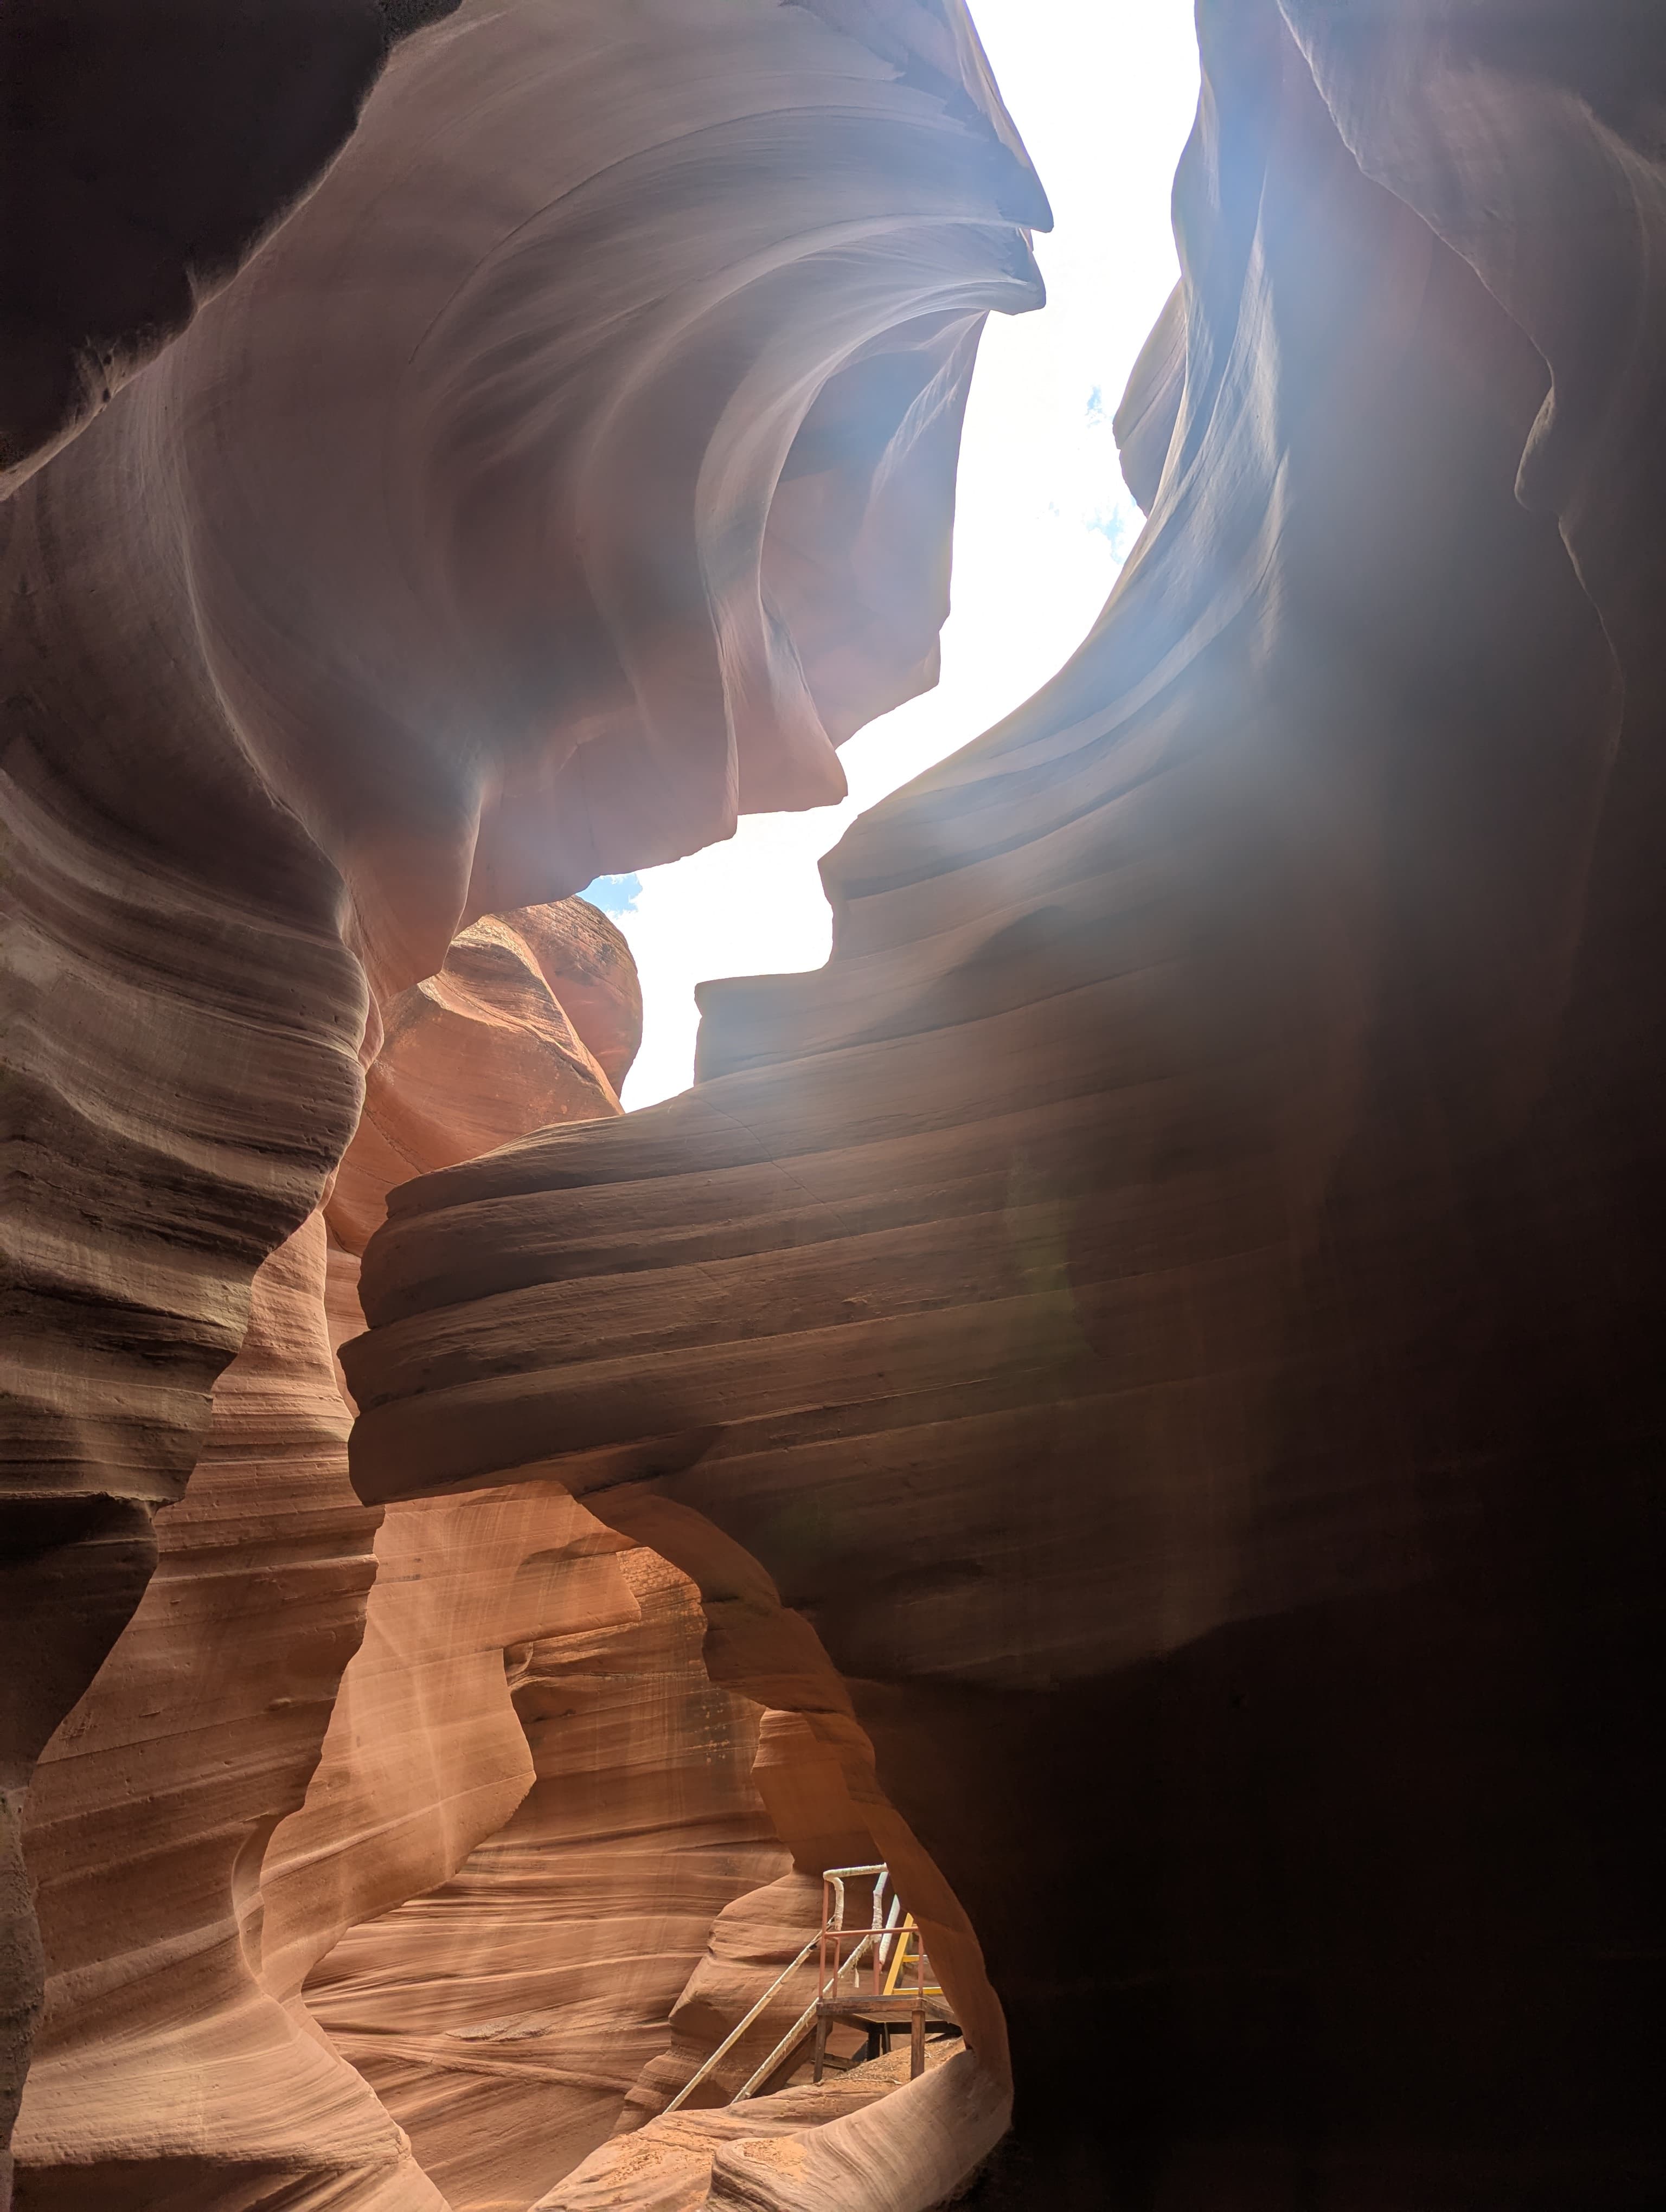
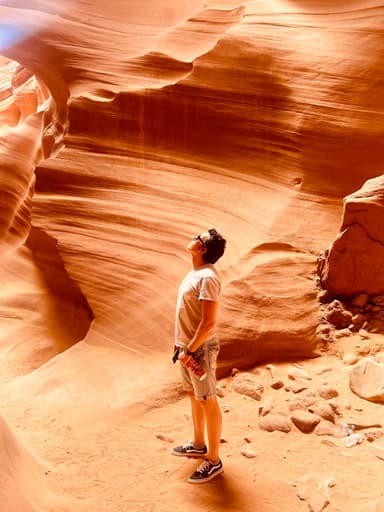
Antelope Canyon + Horseshoe Bend in one day
The same-day combo with timing that lines up the Antelope morning slot with the Horseshoe Bend afternoon-light window.